

Magic Lens Photo Media · Builders & New Construction
A newly completed home gives a photographer clean lines and fresh finishes to work with. It can also produce a gallery full of attractive rooms that says very little about the floor plan. The useful question for a builder or listing agent is what the viewer needs to understand about this particular home.
For a new-construction shoot in Winter Garden, build the brief around three things: how the home is arranged, which finishes are actually shown, and how the indoor spaces connect to the exterior. Those priorities are more useful than asking for a fixed collection of dramatic angles.
Identify exactly what is being photographed
Before planning images, distinguish a model home, a completed inventory home and a property still under construction. The photographs may serve different purposes, and the descriptions need to make that distinction clear.
Give the photographer the confirmed model name, the spaces that are ready, and any finishes or furnishings that require explanation. If a model includes upgrades, the marketing team should identify them accurately. Do not let a photograph of one home imply that every photographed feature is included in another.
Use the façade to establish identity
The exterior view should help someone recognize the home and understand its main form. Consider the entrance, garage relationship, roofline and visible landscaping. Choose timing and camera position around the light and the façade’s actual features.
A frame filled with sky can weaken a home’s presence, just as an overly tight crop can hide the entrance. Use surrounding context deliberately. There is no benefit in including more street or neighboring property if it distracts from the point of the image.
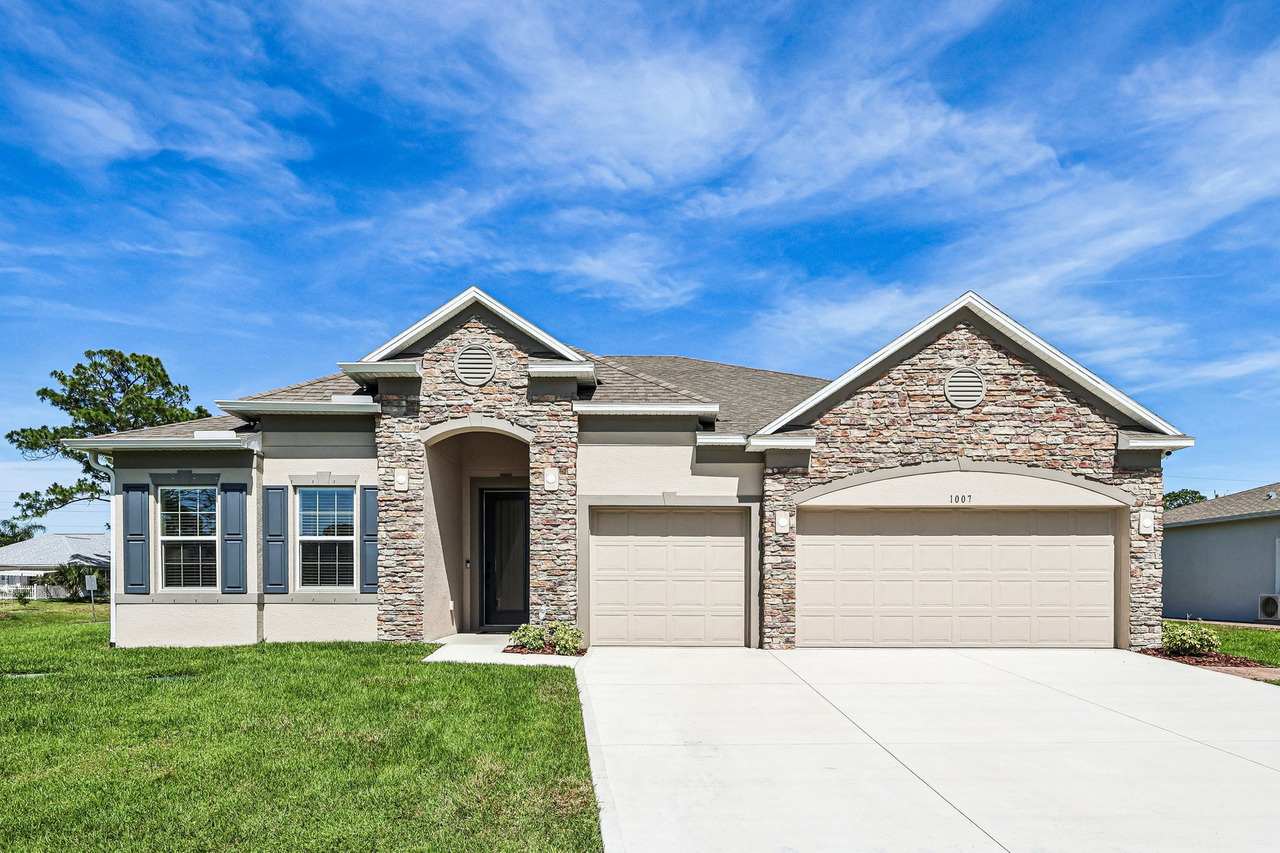
This Palm Bay model-home exterior is a separate Magic Lens project, used here as a composition example. It is not presented as a photograph of a Winter Garden property.
Show connections before collecting details
Begin the interior sequence with the rooms that explain the plan. If the kitchen, dining and living areas connect, include an angle where that relationship is visible. Follow with closer views that let the viewer inspect each space.
A doorway or hallway may deserve a frame when it resolves a real layout question. Photographing every passage without a reason can make the gallery longer without making it clearer. For a floor plan that remains difficult to read in still images, discuss an appropriate plan or interactive tour as a separate deliverable.
Photograph finishes at two useful scales
A finish needs context as well as detail. A kitchen overview shows where the island and cabinetry sit. A closer photograph can then show hardware, texture or the junction between materials. If the gallery only contains details, the viewer loses the room. If it only contains wide views, the finish choices may be difficult to inspect.
Keep color and brightness consistent across the sequence. Do not describe a countertop’s material, a product brand or an upgrade package from appearance alone. Use the builder’s confirmed specifications for those captions.
Give flexible rooms and outdoor areas a clear role
An unfurnished room may need a caption explaining its designated function. Avoid assigning it a bedroom count, permitted use or capacity without confirmation. A thoughtful angle can show windows, entry and usable wall space without implying furniture dimensions.
For the exterior, show how a covered area relates to the house and yard. Add community imagery only when it contributes to the brief, and label it separately from the home’s own amenities. Aerial coverage should answer a site-context question; it does not belong in every new-construction package automatically.
A builder’s pre-shoot handoff
- Property status: Model, completed inventory or construction stage.
- Marketing destination: Individual listing, builder website, brochure or social content.
- Priority spaces: The rooms and connections that explain the plan.
- Feature facts: Confirmed finishes, options and inclusions that need accurate captions.
- Readiness: Cleaning, installation, access and unfinished work that may affect the session.
- Deliverables: Required orientations, selected detail views and any additional formats.
- Fact review: The person who will verify labels before the images are used.
Use the photo-day preparation checklist to organize the physical setup. For a completed project example, read the Palm Bay model-home media case study.
Plan the coverage around the home
Send the address, property status, intended uses and the features your marketing needs to explain. Request a builder media conversation. A precise brief makes it possible to discuss coverage and a custom quote without assuming every new-construction home needs the same package.
Give your next shoot a clear brief.
Send the property link, three priorities and the places where the media will appear.